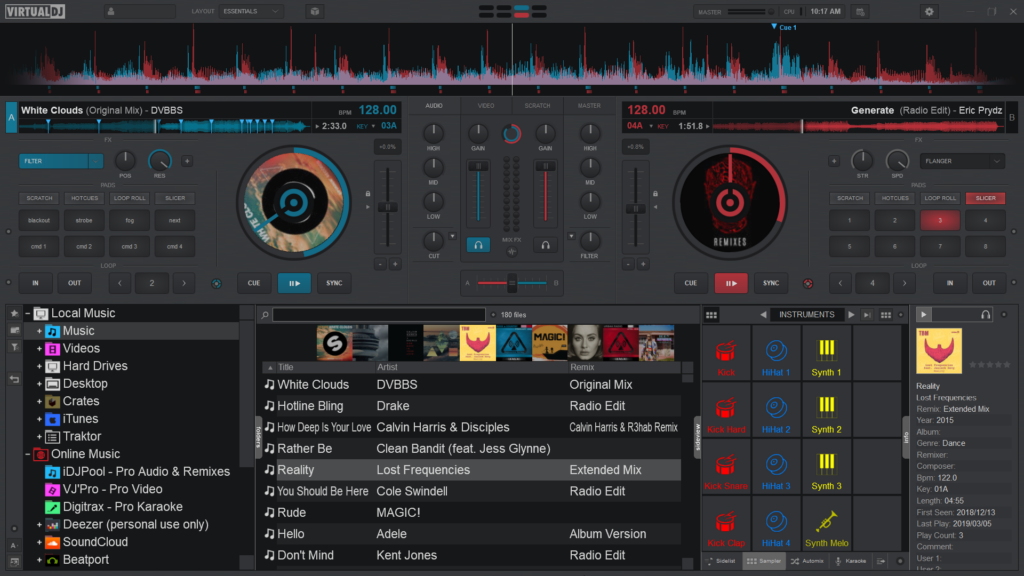
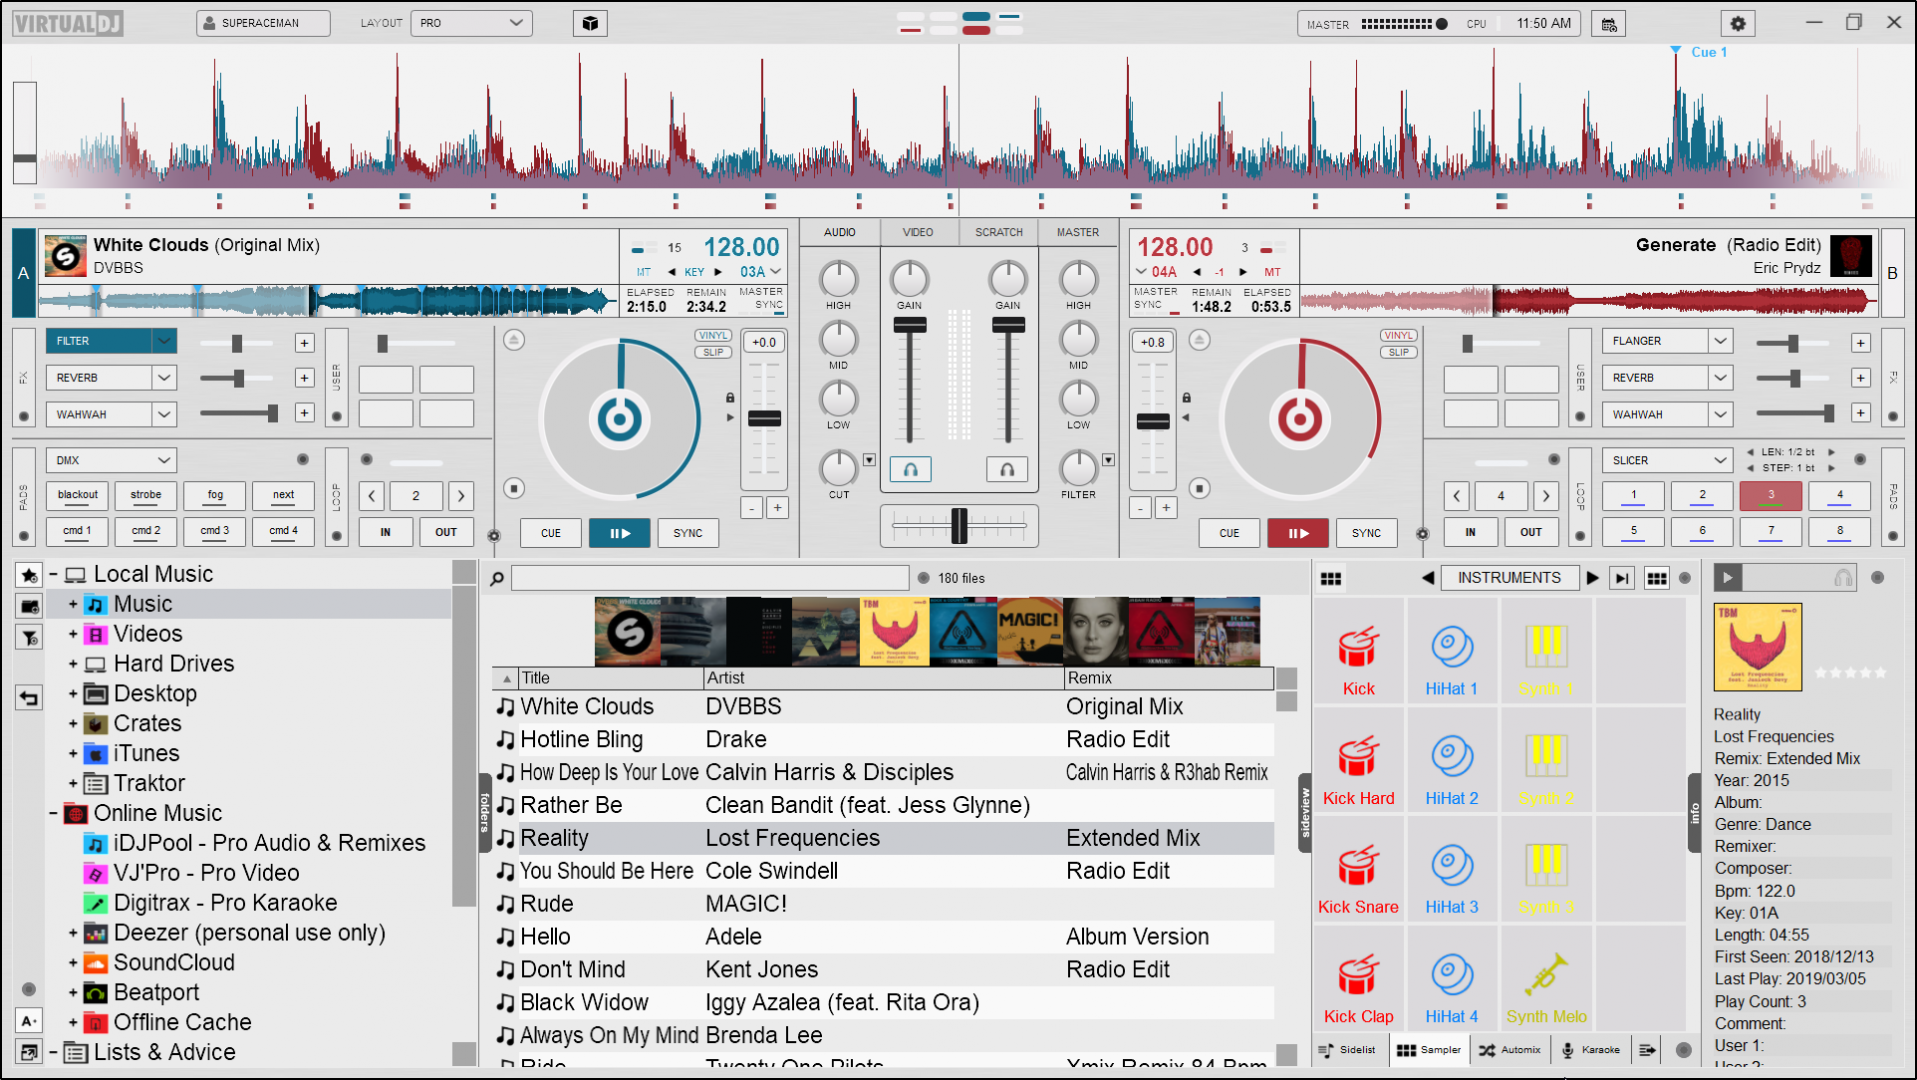
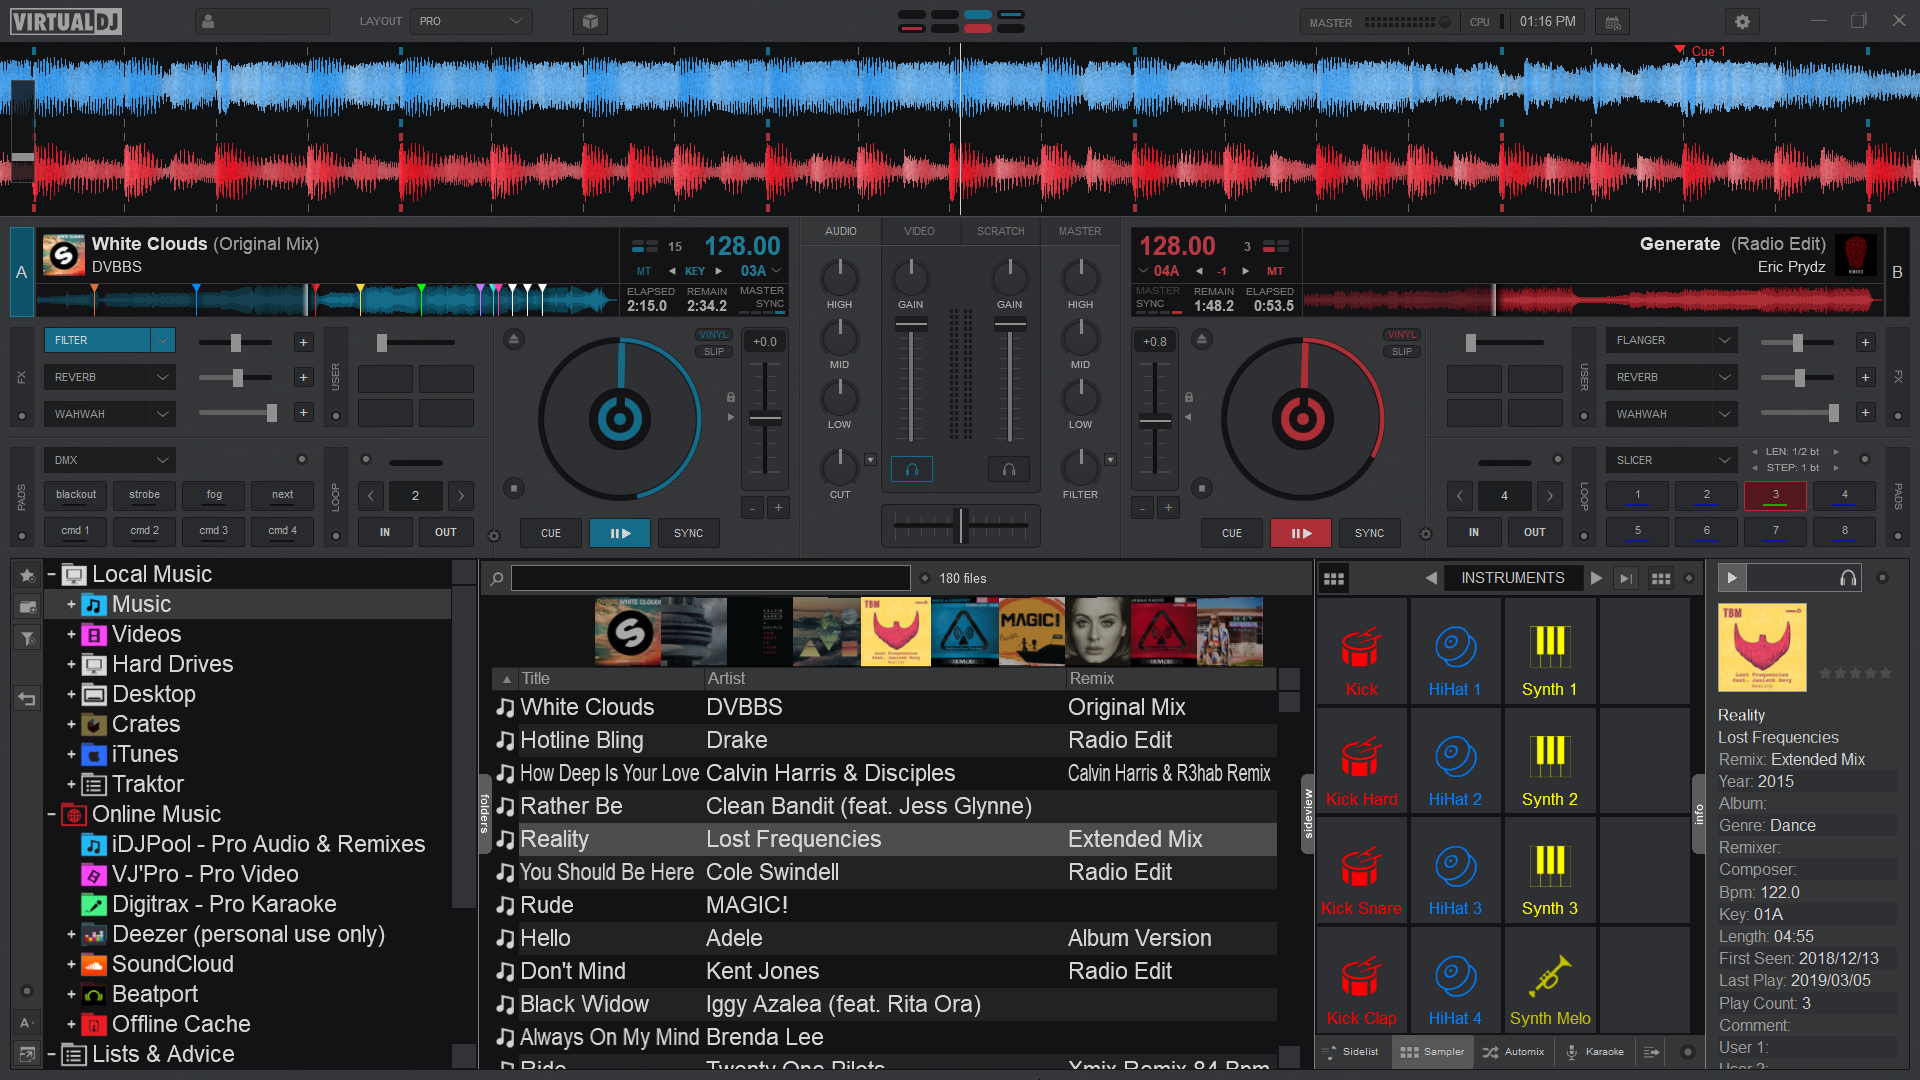
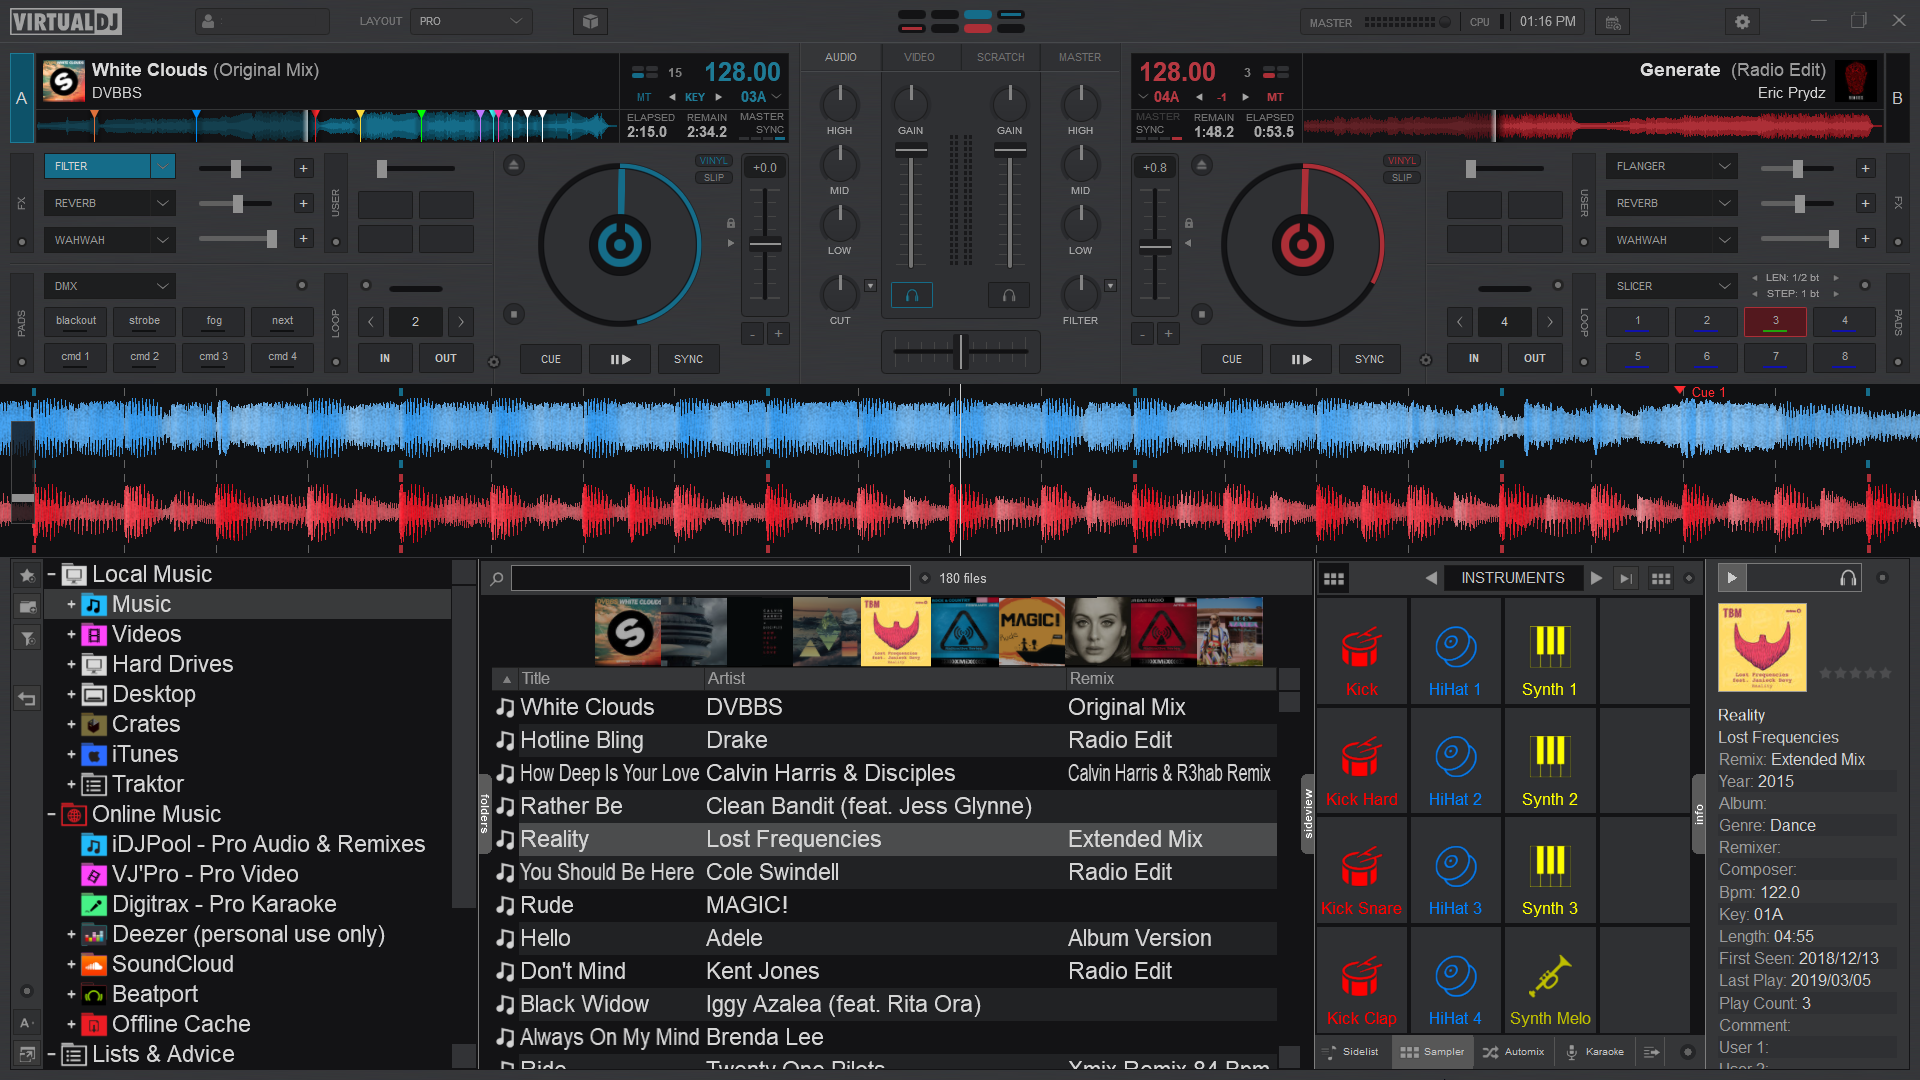
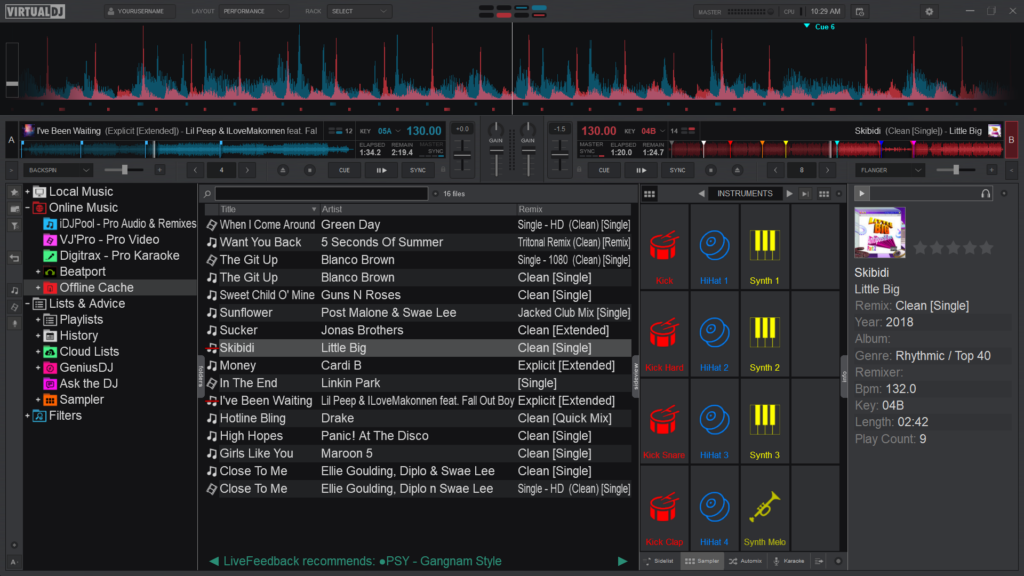
7. Virtual DJ Layout
The Layout menu provides the ability to change the overall look and feel of the Graphical User Interface (GUI). Depending on the Skin Layout that is chosen, other options become available to further customize the details of different areas such as the waveform and jog wheels. The Starter Layout has no customization ability, while Essentials and Pro Layouts have different Layout Options.
ESSENTIALS
Color Scheme – Changes the overall color of the layout (or skin). 3 options are available; Default, Contrast, or Daylight.

Default
Contrast
Daylight
Waveform Display
Changes the appearance of the Rhythm Wave.
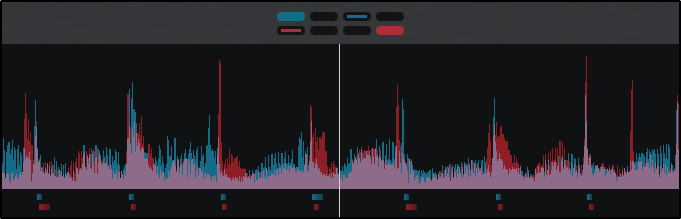
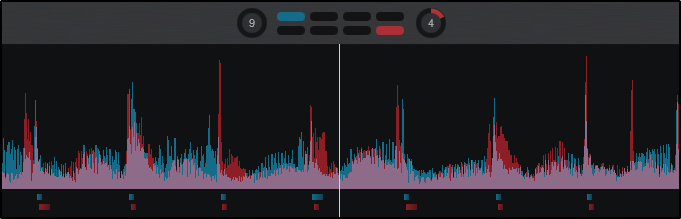
3 display options are available; Beats, Colors, or Shapes. An additional option to Show Gridlines on any of those options is also available at the bottom of the menu.
Beats
Colors
Shapes
Show Gridlines

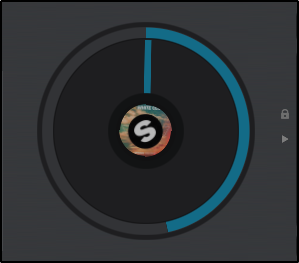
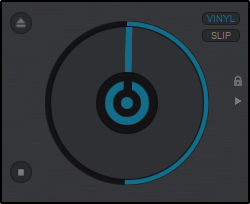
Jogwheel Display
Changes the look of the jogwheel.
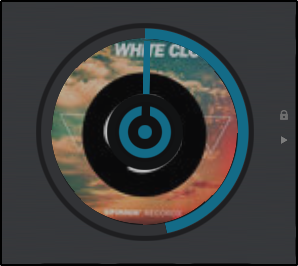
2 options are available; Turntable Look(default) and Spinner Look. Additional options for cover art display are also given for each look; None, Small, or Large(default).
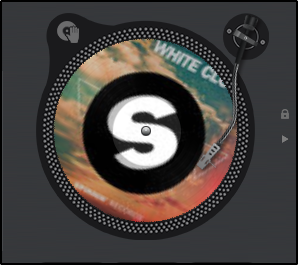
Turntable Look w/Large Cover Art
PRO
Color Scheme
Changes the overall color of the layout (or skin).
4 options are available; Default, Contrast, Dark Mode, or Daylight.

Waveform Display
Changes the appearance of the Rhythm Wave.
3 appearance options, 3 color options, 2 position options, as well as the ability to show grid lines on the wave and display a bar counter on the waveform:
Appearance Options


| Rhythm Enhanced | Rhythm Mirrored | Full Spectrum |
Color Options


| Monochrome (default) | Full Spectrum | Multi Color |
Position Options
Grid lines and bar counter
Rhythm Enhanced Waveform w/Grid Lines and Bar Counter
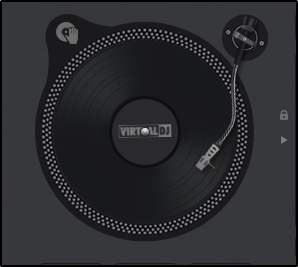
Jogwheel Display
Changes the look of the jogwheel.
3 options are available; Needle, Text, or Needle + Text. The Needle look (default) displays just a spinner while the Text look will display deck information such as BPM, Pitch values as well as elapsed and remaining time. Choosing Needle + Text will combine the 2 looks together.
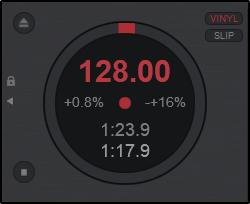
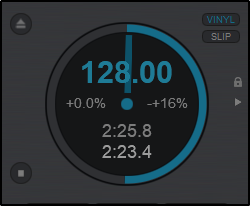
| Needle | Text | Needle + Text |
Beat Counter
Changes the way Phrases are displayed. If Phrase Bars is selected, the phrase will be displayed inside the Beat Keeper with smaller dashes inside the main display. If Phrase Circles is selected, the phrase will be displayed on the outside of the Beat Keeper in a circular display. Selecting Show on Waveform will display the phrase position in text on the waveform.
4-Decks
Displays 4-Deck Mode.
Once selected additional display options are available. The default display is 4-Deck with a 2+2 Channel Mixer but can be changed to a full 4-Channel Mixer.
Performance
Color Scheme
Changes the overall color of the layout (or skin). 4 options are available; Default, Contrast, Dark Mode, or Daylight.
Default

Contrast
Dark Mode
Daylight
Waveform Display
Changes the appearance of the Rhythm Wave.
3 appearance options, 3 color options, 3 position options, as well as the ability to show grid lines on the wave and display a bar counter on the waveform:
Appearance Options


Rhythm Enhanced
Rhythm Mirrored
Full Spectrum
Color Options
Monochrome
Full Spectrum
Multi Color
Position Options
Above
Below
Vertical
Grid lines and bar counter

Rhythm Enhanced Waveform w/Grid Lines and Bar Counter
Deck Layout
Changes the size and position of the decks.
3 Options are available; Full, Compact (default) and Small. When the Full option is selected, other characteristics of the layout can be changed such as the jogwheels (See Pro Layout).
Full
Compact (default)
Small
waveform display
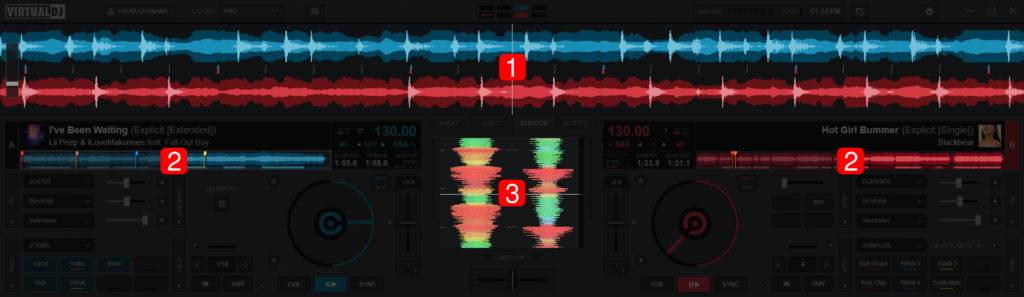
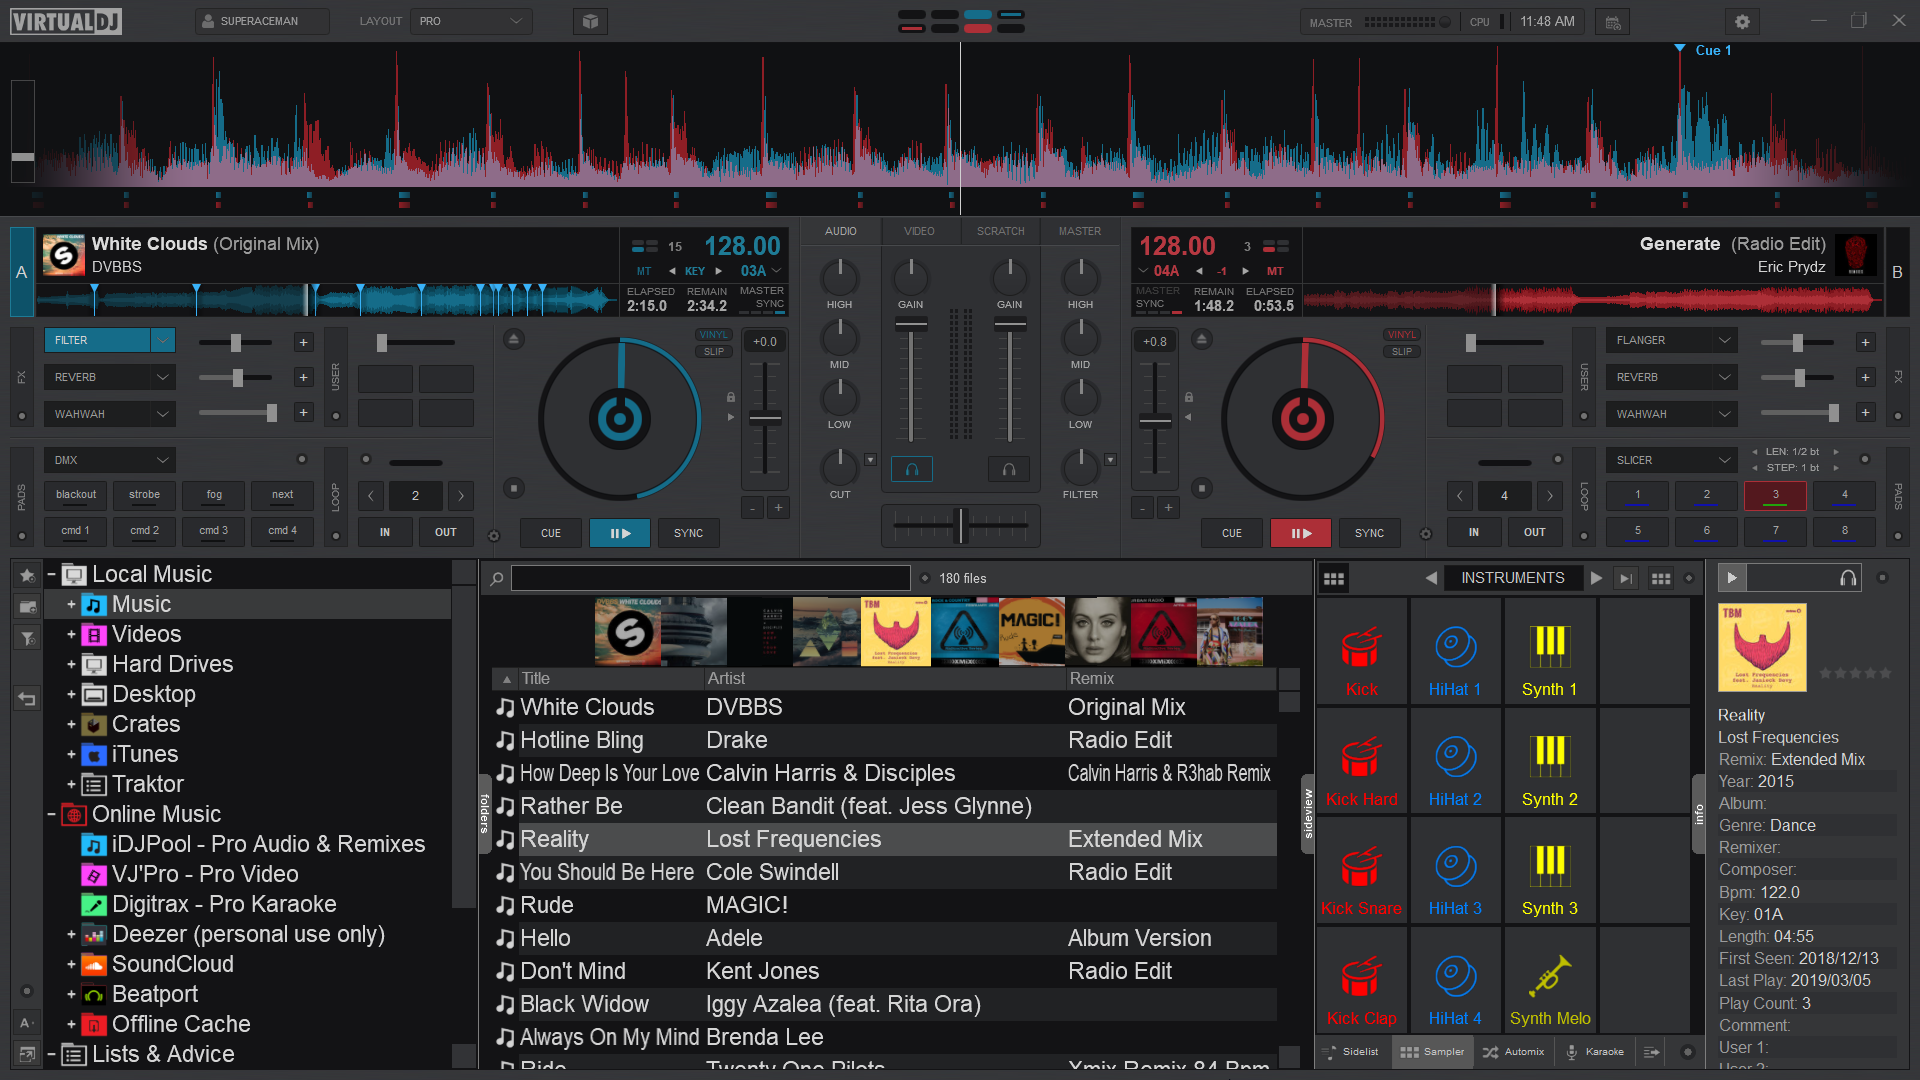
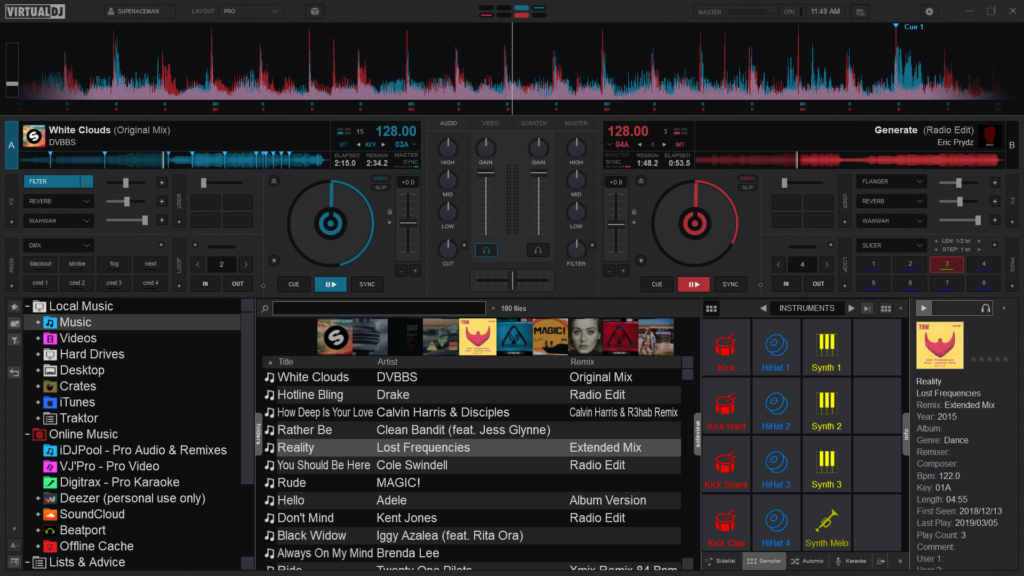
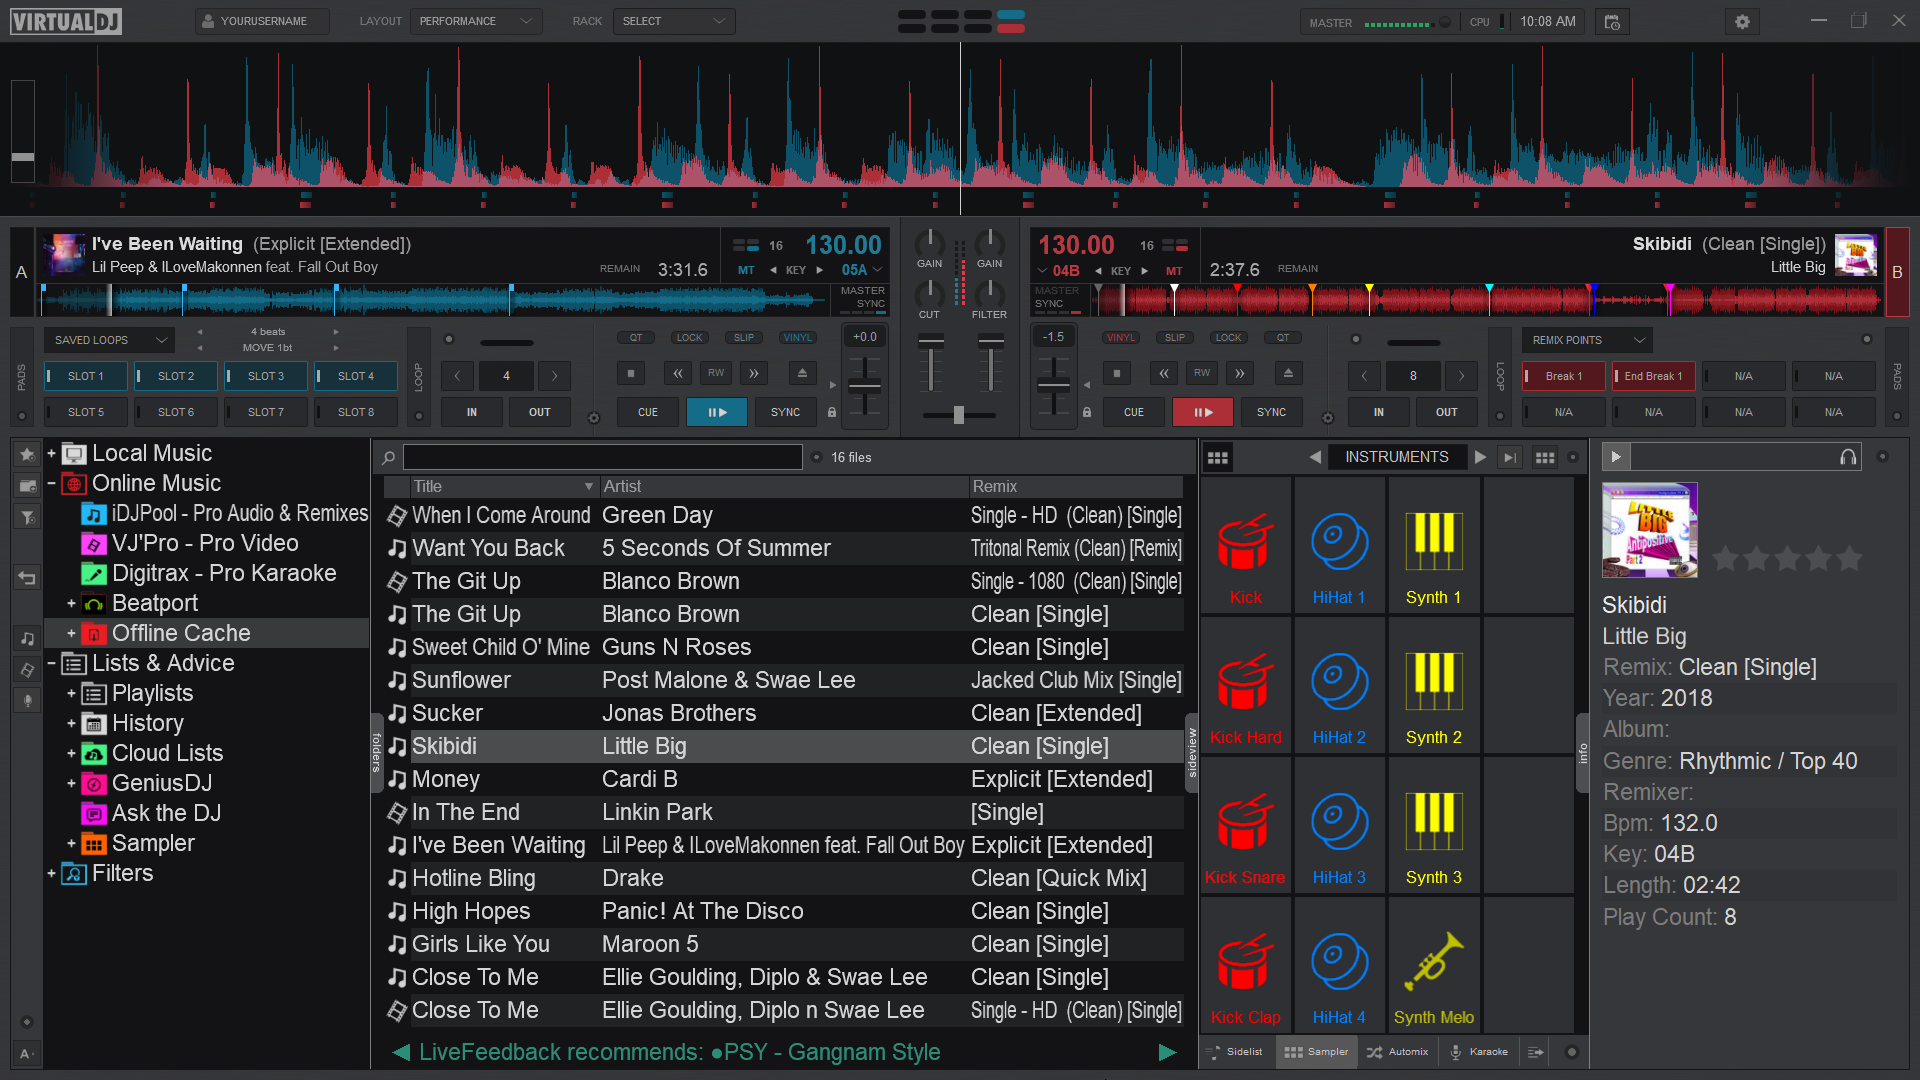
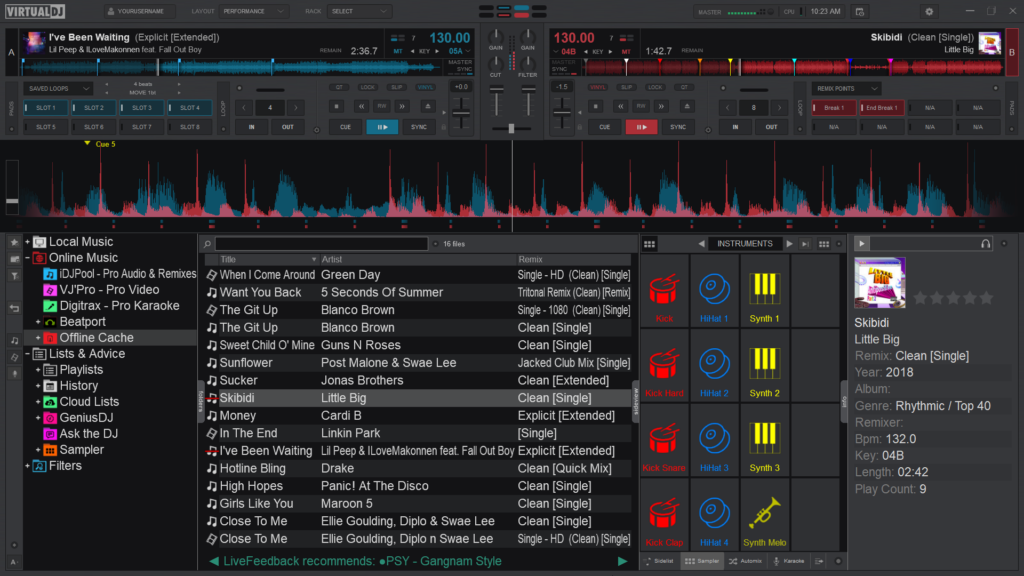
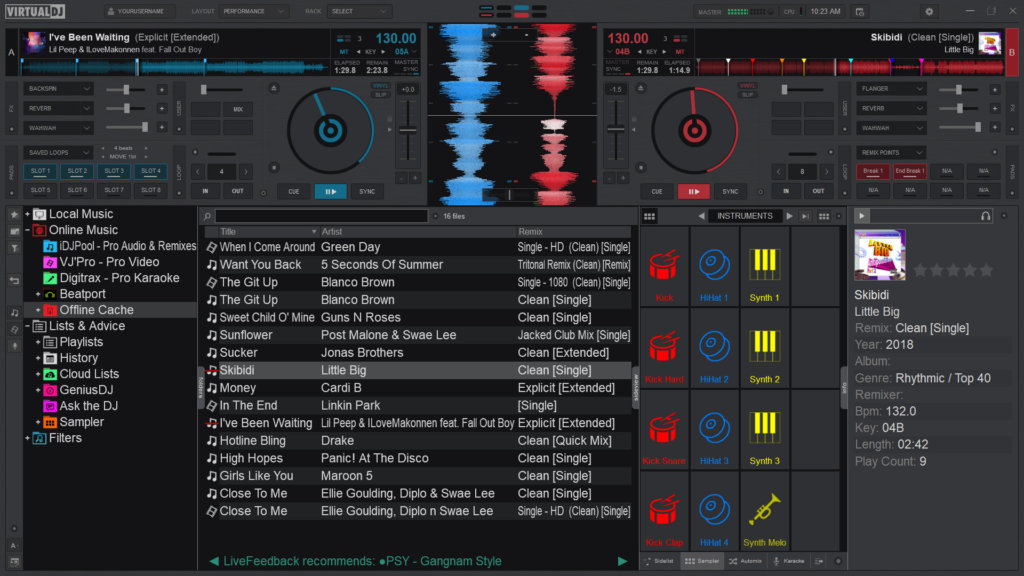
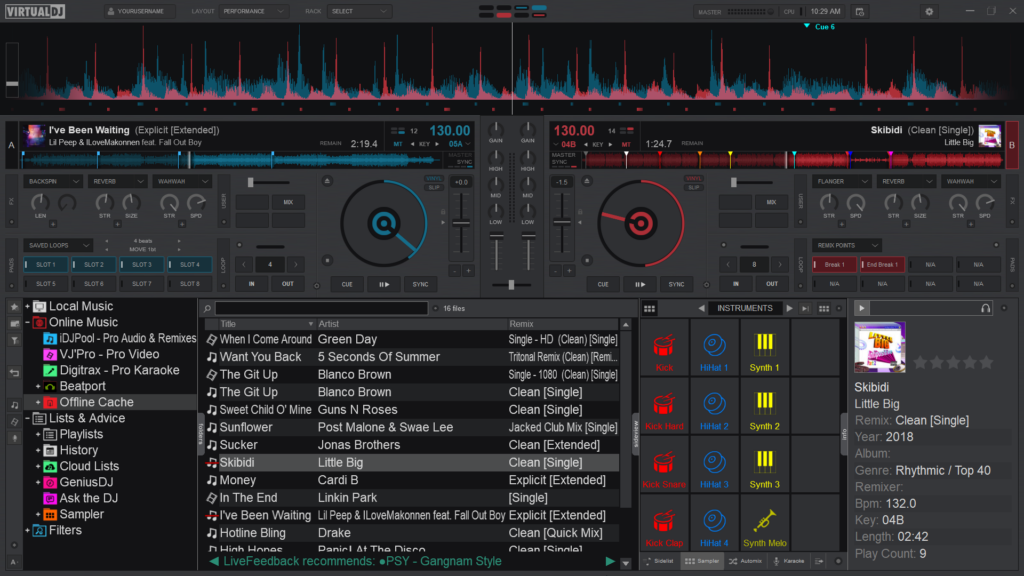
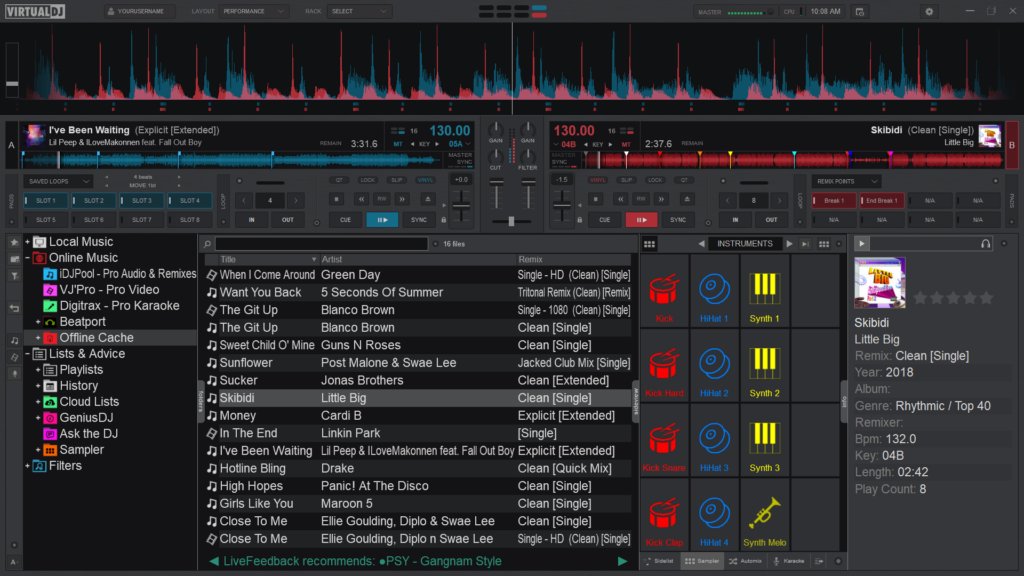
Pro Layout
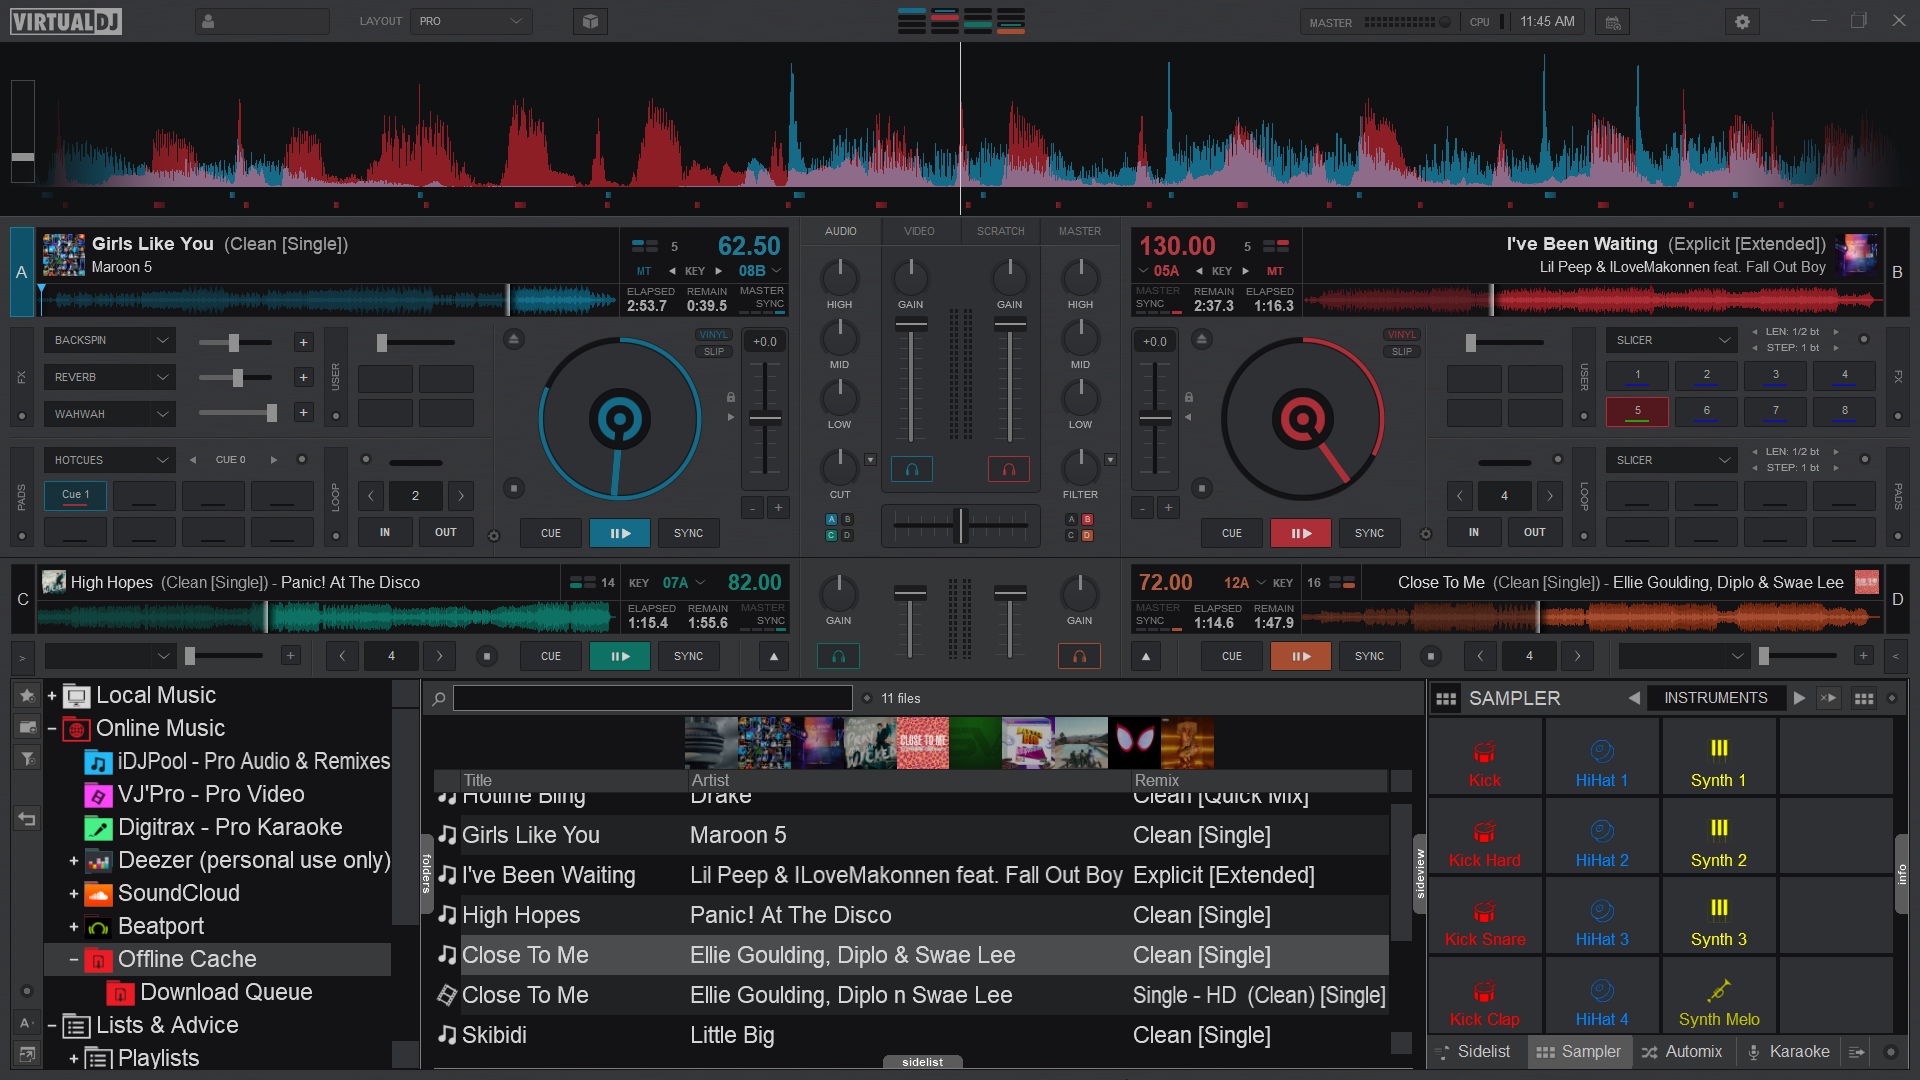
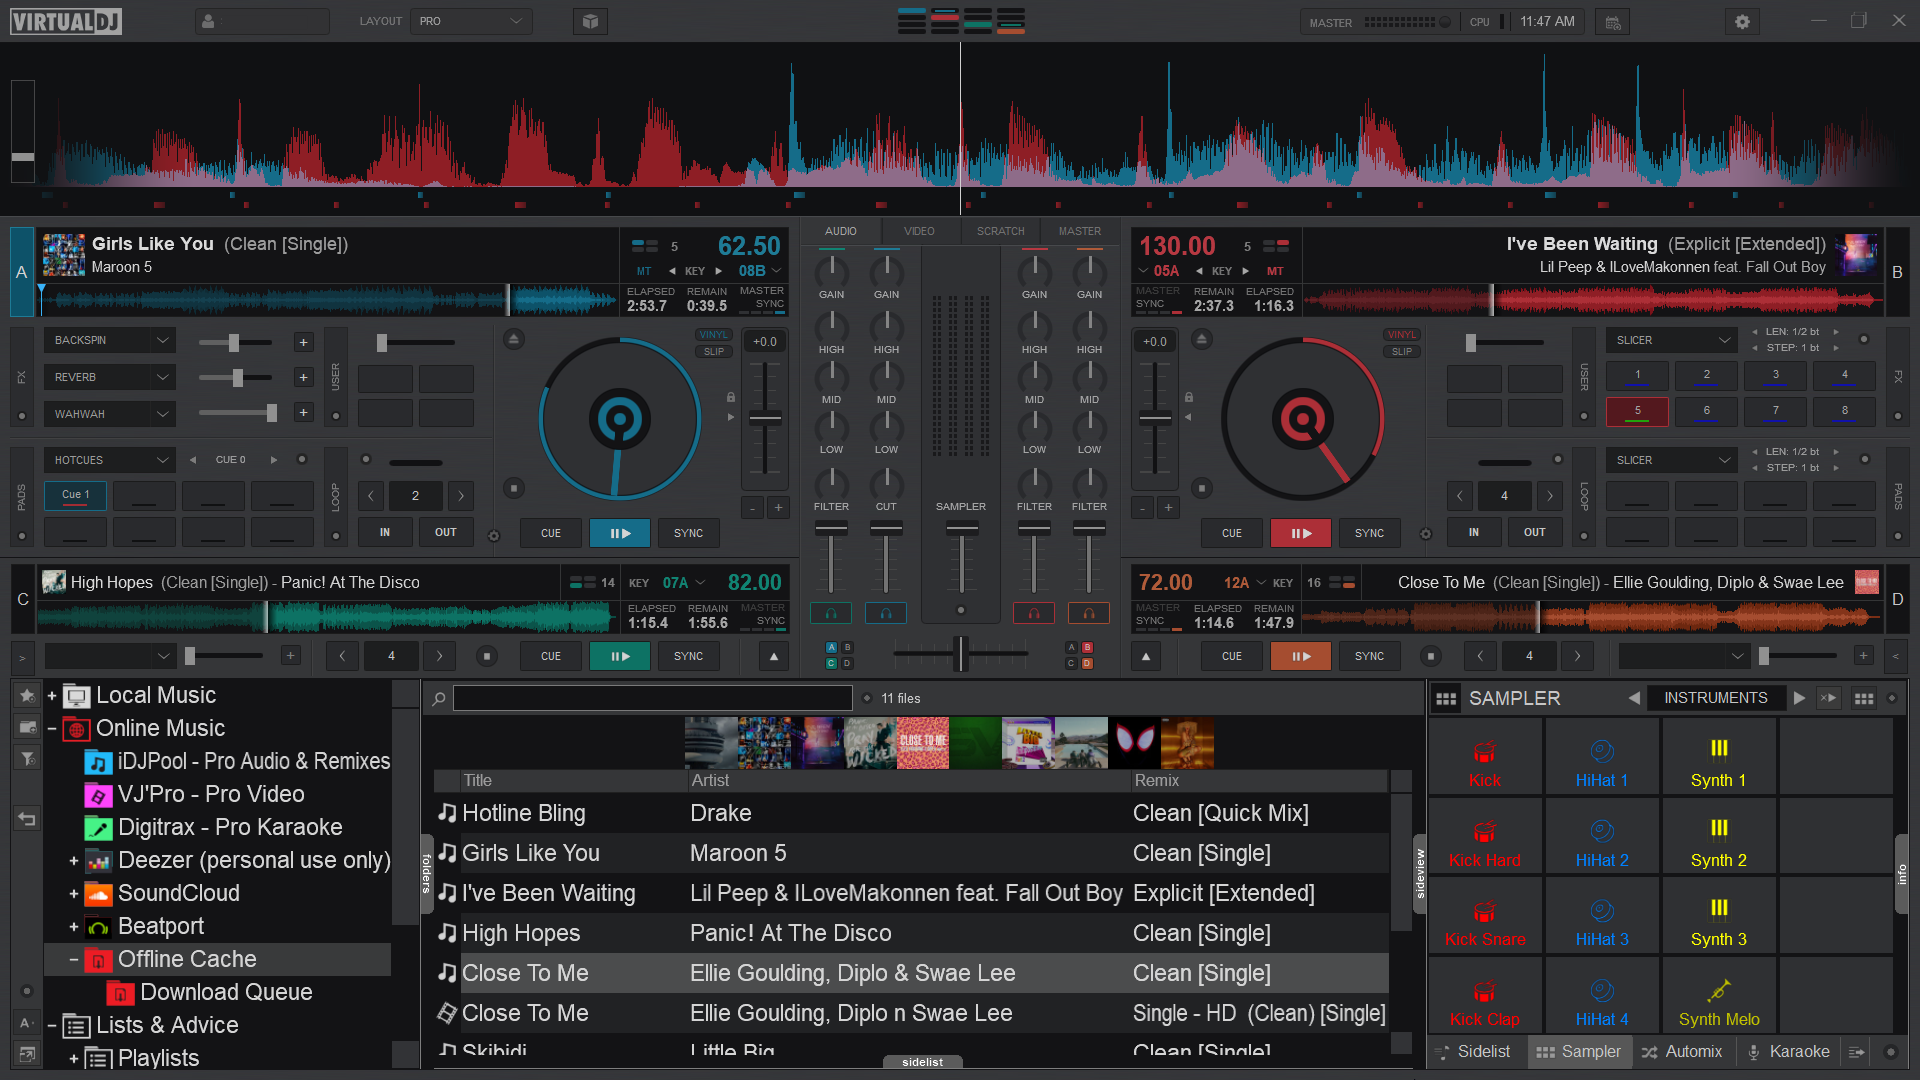
A waveform is a visual representation of an audio signals frequency and amplitude.
There are 3 locations on VirtualDJ’s Main Interface where waveforms are displayed in order to provide valuable visual feedback to assist with mixing and/or scratching.
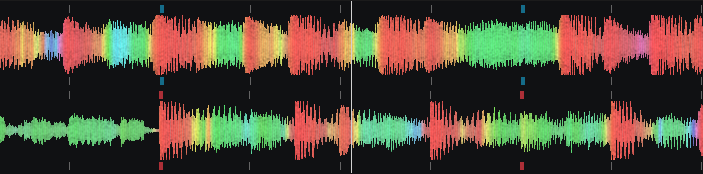
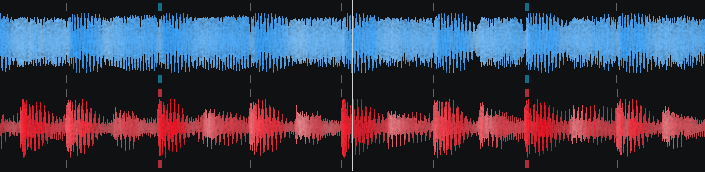
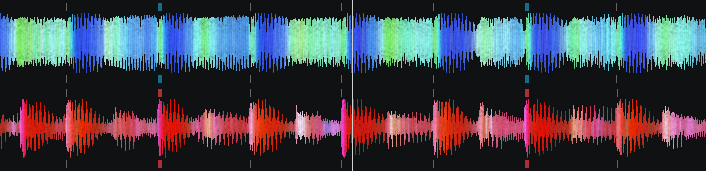
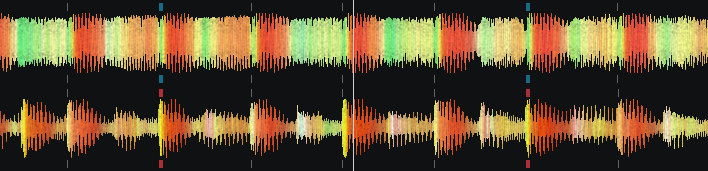
- RHYTHM WAVEFORM. Displays the peaks and curves of the track on multiple decks as well as the Computerized Beat Grid (represented by dashes at the bottom of the wave) to better visualize the tracks relationships with one another and make beat matching easier. How the waveform is displayed can be changed by clicking on the Waveform Display selector in the Layout Menu (Essentials, Pro, and Performance Layouts). If Shapes is the selected Waveform, portions of the waveform will be grayed out when using Stem Isolation features in order to visually display which frequencies are amplified or muted.
STARTER
Shapes

ESSENTIALS, PRO, & PERFORMANCE
Beats
Colors
Shapes (Default)

Show Gridlines
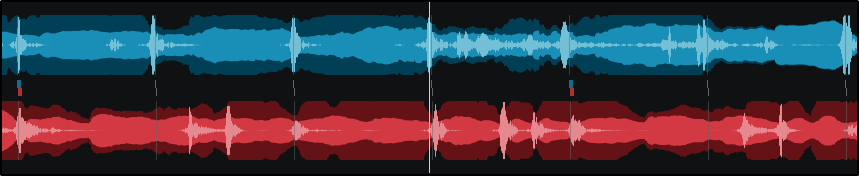
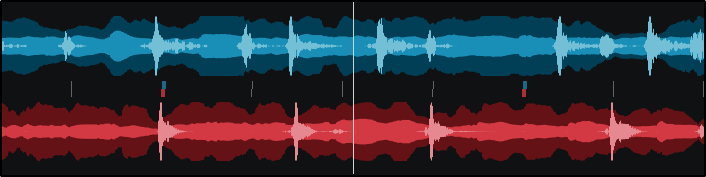
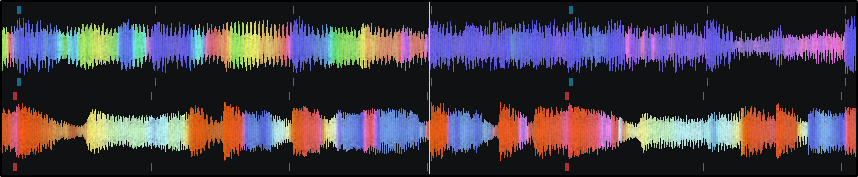
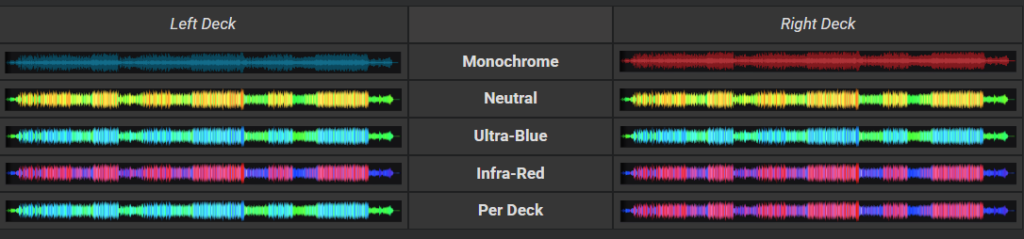
2. DECK WAVEFORMS. Displays a detailed view of the audio information indicated by height and color as well as the tracks playhead indicating its position. The overall track gain (loudness) is indicated by the height of the waveform with the highest parts being the loudest and the shorter portions being softer. If Beats or Shapes is the selected waveform, the decks will display the traditional blue and red waveforms with a beat indicator underneath. If Colors is the selected waveform type, the waveform’s color can be changed to 5 separate options in Settings Options under coloredWaveforms.
| Left Deck | Beats & Shapes | Right Deck |


SCRATCH WAVEFORMS (Essentials & Pro Layouts).
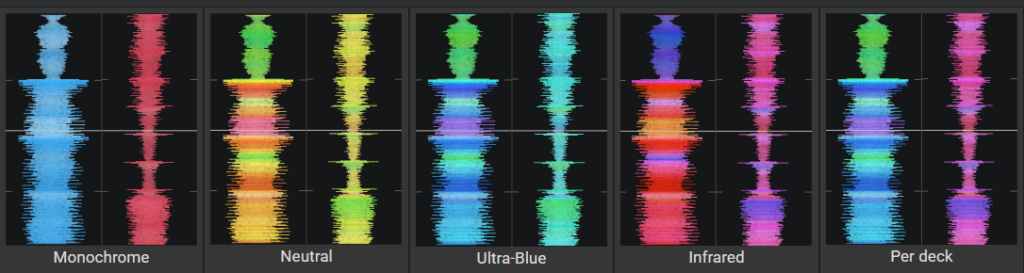
Displayed in the Scratch Mixer and run vertically. Their main purpose is to pinpoint areas of the track that will be scratched to improve accuracy. The Scratch Waveforms can be zoomed in and out by using a wheel mouse, and just like the Deck Waveforms the color can be changed to 5 separate options in Settings Options under coloredWaveforms.
Sandbox Mode

Sandbox is a feature that puts VirtualDJ into a “test” mode to experiment with the upcoming mix in advance without disturbing what the audience is actually hearing. This feature is available in Essentials and Pro layouts. While in Sandbox Mode, VirtualDJ moves the master output to the Top Section of the interface into the Sandbox Deck (beside the Layout Selection) to give a visual output of the master outputs current position. While in Sandbox Mode, the rest of the software controls can be manipulated and adjusted without affecting the master output. The audio being experimented with will only be audible through the PFL if a headphone channel has been created in the Audio Setup.

Sandbox Disengaged

Sandbox Engaged
To activate click on the Sandbox button. The waveform will load into the Sandbox deck and will continue to play from it’s current position.
With the software in Sandbox Mode the track can now be manipulated by jumping positions with the playhead, crossfading between decks, EQ or filter, apply effects, add hot cues or apply loops, etc. with the preview of these alterations only playing through the PFL.
- Indicates the manipulated or test position of the track heard through the PFL
- Indicates the actual position of the audible track being heard by the audience (master output)
Once Sandbox is disabled, the track in the active deck will jump back to it’s current playing position from the Sandbox Deck without interrupting the master output as if nothing happened.
Sandbox will not operate in the following cases:
- The Audio Setup is not configured as master + headphones
- Already in the middle of a mix (more than one song is playing out on Master).
- Effects, samples or loops playing on the “active” deck.
- A Video file is playing in the active deck
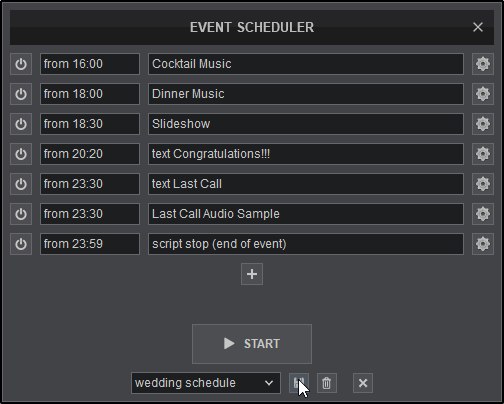
Event Scheduler
The Event Scheduler provides an easy to use interface that will automate VirtualDJ functions in sequential order based on time. This feature is used to automatically start and or/stop predetermined events such as playing a playlist or sample, adding text or a slideshow to the screen, or even using VDJScript for more complex event actions.
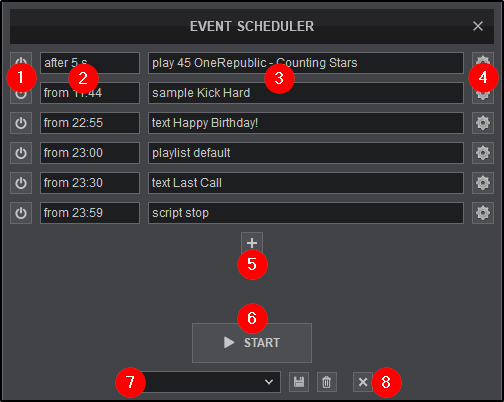
- START/STOP (Single Event). Starts and or stops an event immediately.
- TIMELINE. Displays when an event will start either based on duration or at a specific time on the clock.
- EVENT NAME. Displays the event scheduled (can be customized).
- EDIT. Opens the specific event in order to edit it’s properties.
- ADD. Opens the ADD EVENT ITEM menu where individual event items can be created.
- START/STOP. Starts or stops the entire Event Scheduler
- EVENT MANAGER. Provides the ability to save an Event Schedule by adding a name into the text box and clicking the save icon. Using the drop down provides access to select any previously created events that have been saved. Clicking on the trash can icon will delete the event that is in focus (selected).
- CLEAR. Removes all events from the Event Scheduler to start with an empty list.
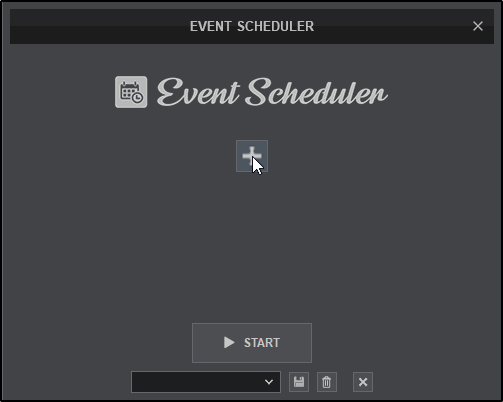
Creating an event
1. Open the Event Scheduler by clicking on the button in the Application Controls

2. Click on the button in the center of the Event Scheduler to create your first event.
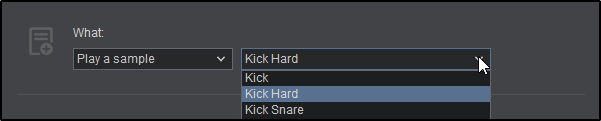
3. Select an action to perform. Actions can be as simple as playing a file or sample, or adding text or a slideshow to the screen. Using VDJscript actions is also a possibility.
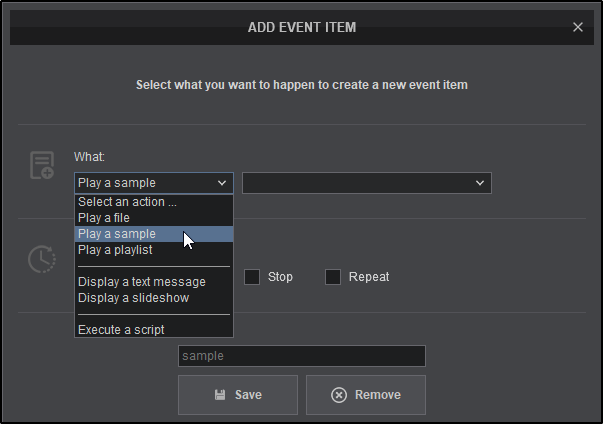
4. In this example Play a sample has been chosen. Use the box to the left to choose which sample will be played.
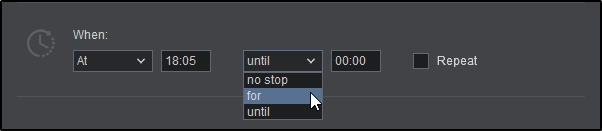
5. After the action is selected (the What), it’s time to select when the action will take place. This can be a specified interval or at a specific time. Click on the dropdown menu to select After to input a duration in seconds (s) or minutes (mn), or At to input a specific time on the clock.

6. Clicking on the Stop check box will provide the option of when to stop the action. Select no stop if the action doesn’t require one, or you don’t wish to stop it. Select for if you want to set the duration in seconds or minutes, or select until if you need to specify a specific time for the action to stop.
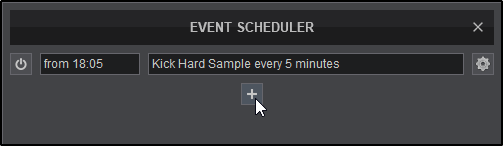
7. Clicking on the Repeat check box will provide the option of when or if to repeat the action. Input the time interval between actions (every), and the duration (for) if the action is to be repeated.

8. Once the steps are completed, you can give the event a custom name and click the Save button. If no name is selected, VirtualDJ will name it based on the action automatically.

9. Once saved, the created event will appear in the Event Scheduler. Continue adding events by clicking on the button.
10. When you have completed scheduling events, you can name the event schedule and save it for future use by clicking on the save icon.
To create another event, click on the X icon to clear the list and begin the process again. Each event will appear in the drop down menu to be recalled at a later time or deleted using the trash can icon.
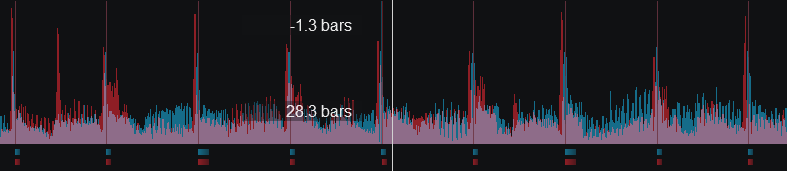
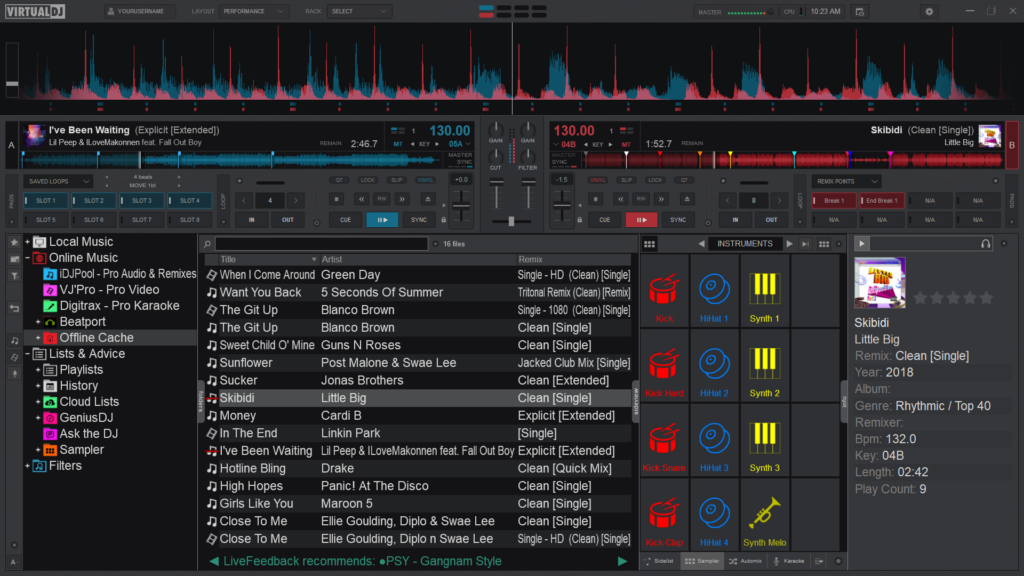
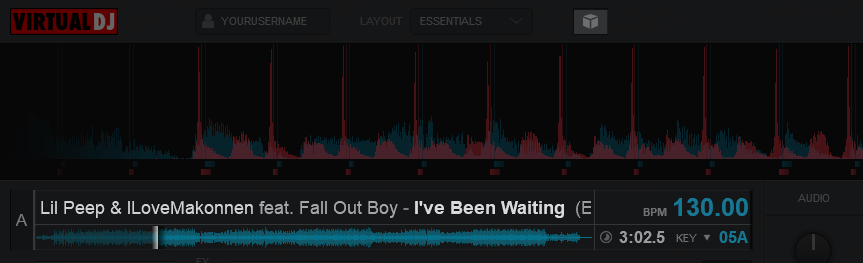
Rhythm Wave

Pro Layout
This area tracks the waveform of each song loaded or playing on a deck. It also features a Computerized Beat Grid (CBG) used for visual mixing and beat-matching.
- ZOOM SLIDER (Pro and Performance Layouts). Use the slider to zoom in/out and adjust the visible area of the wave in the waveform.
- PHRASE INDICATOR (Pro Layout Option). Indicates on which beat of the 16 beat phrase the track is on. This can be turned on or off in the Layout Menu under Beat Counter
- BEAT KEEPER. Indicates on which beat of the 4 beat bar the track is on.
- LYRICS OVERLAY. Displays the lyrics of the track (when available) in relation to the waveform. Lyrics can be edited in the Lyrics Editor or optionally turned off by going to Settings Options showLyrics and selecting No.
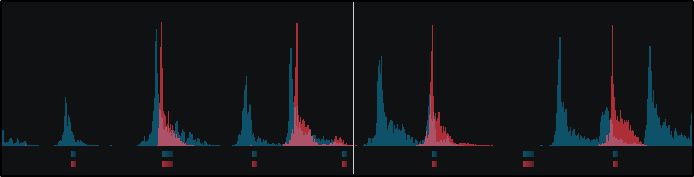
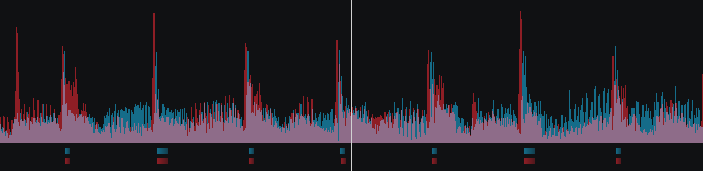
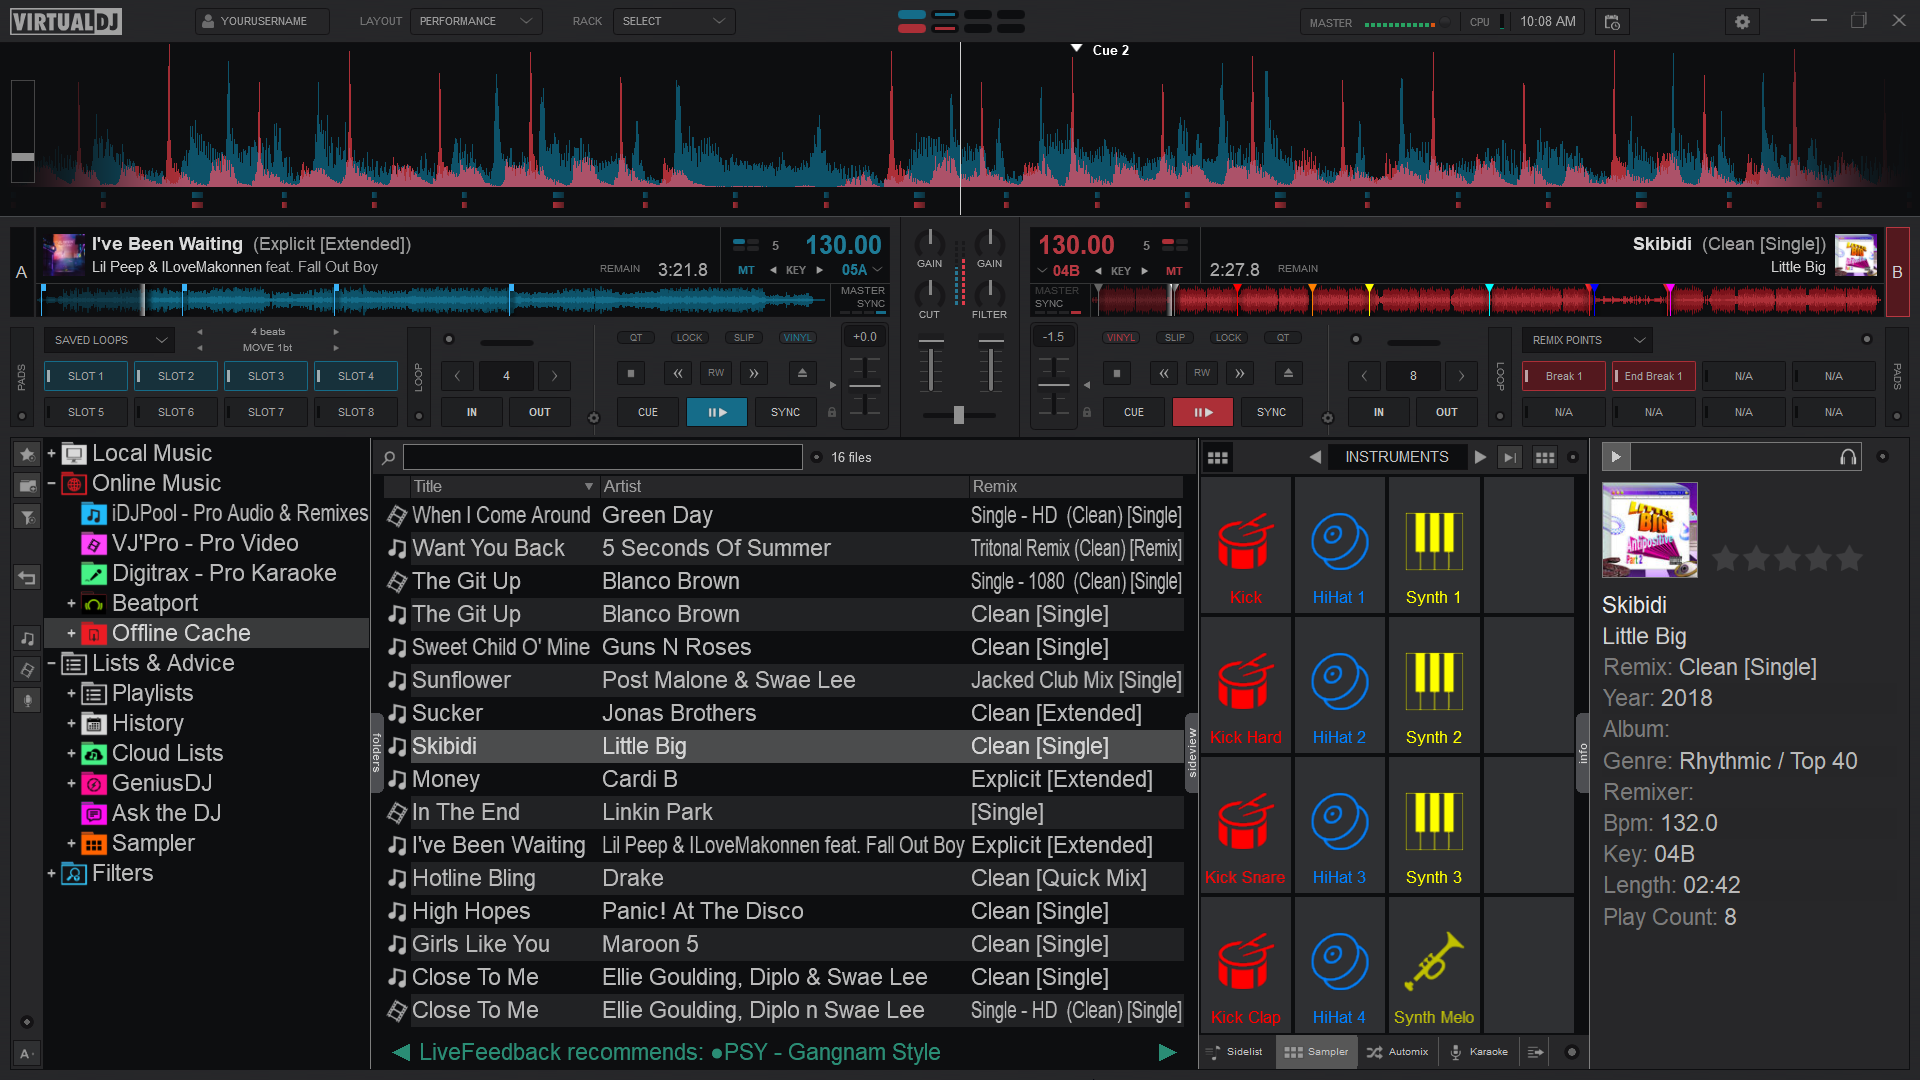
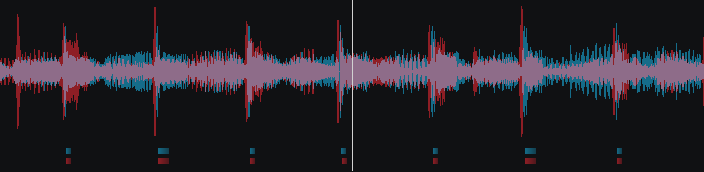
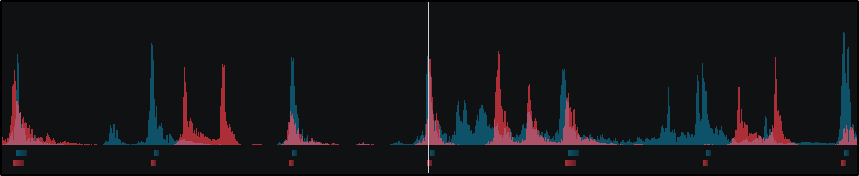
- RHYTHM WAVE & CBG. This waveform provides a visual representation of the audio curves and peaks corresponding to the rate/rhythm of the music. The peaks in the waveform represent the beat of the music and are used to help synchronize multiple tracks together by matching (overlapping) the peaks to occur at the same time.
The current position of the track (present) is represented by the position marker (white line) in the middle of the screen. As the track plays, the waveform scrolls from the right to the left travelling over the position marker. Everything to the left has already been played (past) and everything on the right represents what has yet to be played (future).

Below the waveform there are small blocks named CBG (Computerized Beat Grid), which represent the position of measures. The large blocks represent the beginning of a measure (4:4 time). The CBG of a track is used for synchronization of samples, effects, autosync features and anything else in the VirtualDJ that uses the track’s beat to determine position or timing. The CBG can be altered or adjusted by using the Tap Button, the POI Editor or the BPM Editor.
The Rhythm Wave also has alternatives on how it can be displayed. See Waveforms for more information.
There are 3 very common scenarios on how the Rhythm Wave will display the audio information:
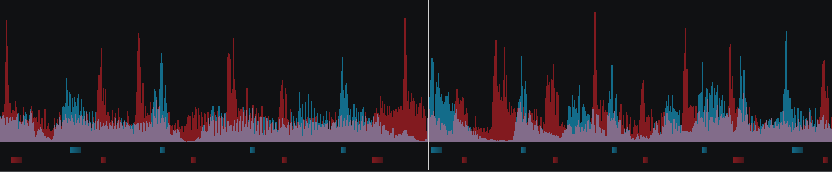
The tracks are NOT beat matched and the CBG in NOT aligned – This scenario is the most common. Loading any 2 tracks onto the decks and pressing play will not synchronize the audio unless an autosync feature is enabled.
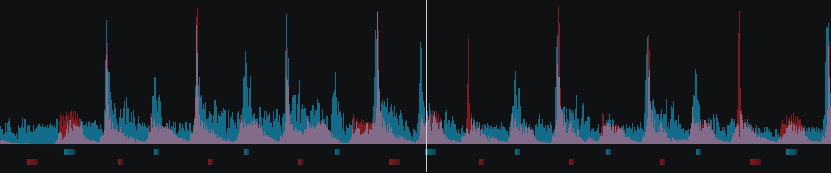
The track IS beat matched but the CBG is NOT aligned – This scenario is less common as the CBG is not lining up with the peaks of the corresponding waveform. This is due to either an incorrectly beat gridded track or a track that has a variable BPM (See BPM Editor). However, the tempo of the track is identical to the opposing deck and although the CBG does not align, the actual beats (peaks) of the track can be overlayed to the opposing deck allowing the tracks to be beat matched.
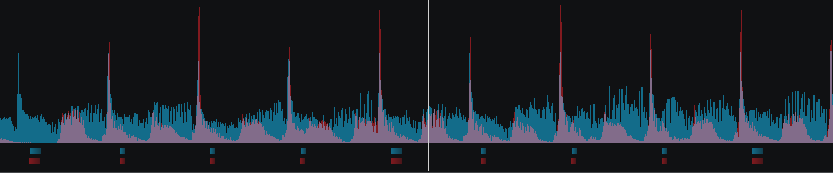
The tracks ARE beat matched and the CBG IS aligned – This scenario is ideal. The tracks are both beat gridded properly and the CBG is aligned with the peaks of the waveform perfectly in sync.